

It’s almost here. We’re just a day away from the release of NBA 2K20. Thanks to the latest change in the series, players are allowed to test their MyPlayer’s potential for the MyCareer mode. This improvement to the series is a much-needed one because, in the past, you had to spend countless hours or money to get the true feel of your virtual hooper.
With that being said, many excited gamers, including myself, have put a lot of time into creating the perfect player build in the demo. Well, if you’re thinking about creating a stretch big this year, you don’t have to waste any time because I have the best build out there. Today, I’m going to walk you through how to make this godly player.
Vitals
On the very first screen of the MyPlayer Builder, make your position power forward. The player must be a PF because they can have a much higher 3PT rating than centers. Everything else, including which hand you shoot the ball with, doesn’t matter.
Pie Charts
A new addition to the MyPlayer creation is the pie charts. These and the potential selection (which we’ll get tp) give the player more control over the style his or her character plays.
There are two different pie charts. The first one is the skill breakdown, featuring ten various skill charts to choose from for the PFs. Each one is divided into four colors, and each color represents a certain basketball skillset. Blue means finishing, green means shooting, yellow means playmaking, and red means defense/rebounding. The more of the chart a color takes up, the better the player is at the skill the color signifies.
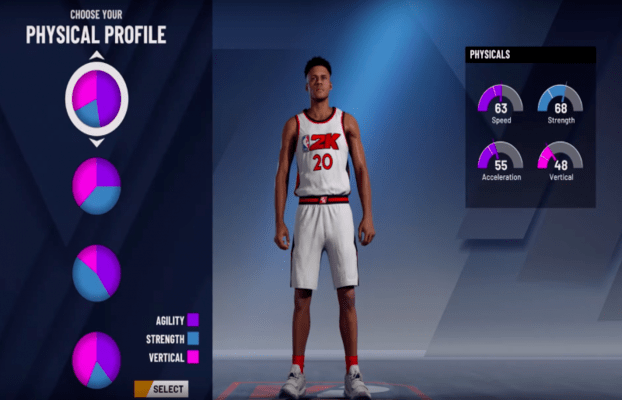
The second pie chart is the physical profile. There are five to choose from. These are broken down into three colors. Purple means agility, blue means strength, and pink means vertical.
For this particular build, you must pick the skill breakdown chart with the most green because that gives you the best 3PT shot. And, for the physical chart, you must select the one with the most purple. Despite it having the weakest possible strength, it gives you the highest speed rating, which is crucial to compete on both sides of the ball.
Set Your Potential
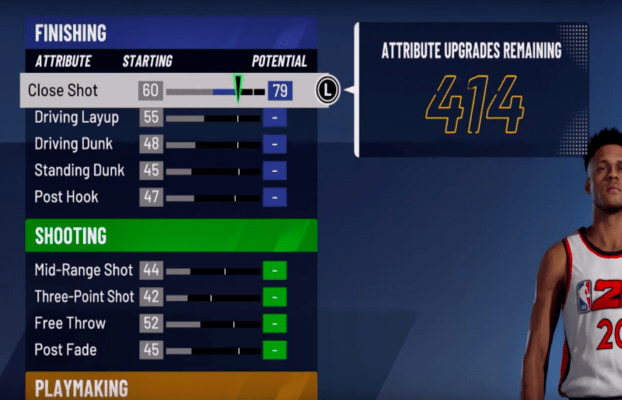
Now, each player has a total of 440 potential attribute upgrades to spend. This means, for example, if you use some of the potential attribute upgrades to give your player a 79 shot close, your player has the potential to max his close shot out at a 79 rating when you start playing.
For this “demigod” build, right away, you’re going to max out everything under the shooting category but free throw. This gives you a 91 mid-range, 89 3PT shot, and a 95 post-fade. For free throw, cap the rating to an 86 overall not 89. Free throw ratings aren’t all that important when it’s above 80. An 86 rating still allows you to obtain the max amount of shooting badge upgrades while saving three valuable potential upgrades.
In playmaking, max out ball handle (58) and post moves (76), and upgrade pass accuracy to a 78. The higher the ball handle and post moves ratings, the better because you’re going to need speed to create your own shot.
For defense, this is what you are going to need to do. Max out interior and perimeter defense (67 & 63) and lateral quickness, so you don’t get bodied or blown by that much. Max out steals (64), so you can strip big men with no handles. Also, if you max out defensive rebounding, you get a 76 rating, which for a sharp-shooting PF, is a great one, especially when going up against bigger opponents in the Neighborhood or Pro-Am.
A higher shot close rating improves the chances of the player making shots down low, so max it out at 85. I’ve seen a lot of people who are making stretches not even touch shot close. However, we’re basically making Dirk Nowitzki. This particular build isn’t only deadly from beyond the arch but also as a post-scorer.
Despite this build not doing any slashing, upgrade driving and standing dunk to 40 because a 40 overall dunk is the minimum rating to allow a player to be capable of dunking.
For the remaining 19 attribute upgrades, it’s personal preference. What I did is divided them between block (40) and driving layup (52) to not be complete booty cheeks at those skills.
Body
To be honest, I don’t know how body shape affects your player. Each form does no harm or good to the potential ratings. For me, I’d go with the compact body shape because it seems to be the balance between slight and built.
The height of the player is 6’10”. Any height 6’9″ or lower is a no go because it’s basically a small forward. Any height above 6’10” just takes too many good ratings away such as a minus-five for 3PT shot and a minus-eleven for ball handling.
For weight, put it at 249 lbs. At this weight, you get stronger with a plus-two in interior defense and strength without dropping speed.
Make your wingspan the lowest possible measurement (82.0″). Even though a short wingspan hurts you a bit defensively, offensively it makes you even more dangerous. Your wet jumper now has a 94 mid-range shot and a 91 3PT rating. It boosts your handles and posts moves by two. Also, it increases your strength by one.
Takeover
A cool addition to the latest MyCareer installment is the option to choose your takeover. This means that when a stretch big gets hot, they can now have post-scorer takeover instead of sharpshooting.
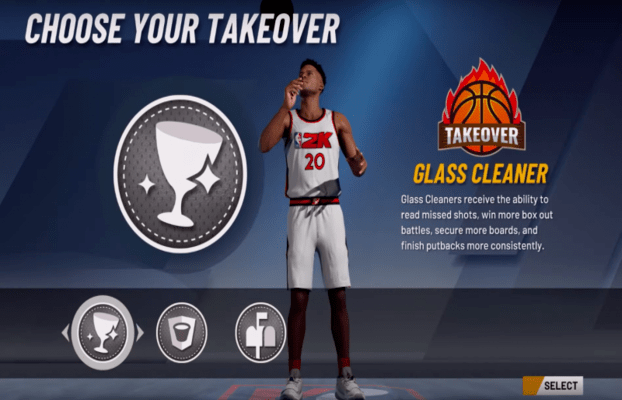
For this overpowered build, select the spot-up shooter takeover, so you can shoot green lights from downtown.
Badges
One of my favorite changes to the MyCareer mode is that you can choose your own badges for your MyPlayer. In the past, every build had its own set of predetermined badges. Now, you have more control over the in-game advantages your player has over others.
For your one and only potential finishing badge, upgrade backdown punisher to bronze. This badge is going to help you have more success backing down players in the paint. For the demigod’s case, it helps him punish defenders while he’s backing them down before he shoots a fadeaway.
Since we maxed out basically every shooting skill, we have 30 potential shooting badge upgrades. Immediately, what you’re going to do is put quick-draw on Hall of Fame. This badge is make-or-break because you can’t change your jump-shot speed this year. Your jump-shot speed is all dependent on the level the quick draw badge is on. This build is a shooter who needs to get the ball out of his hands and into the hoop before the contest. Without this badge equipped, your jumper is very slow.
Another important badge is slippery off-ball. Make sure that it’s at least at gold because, as a stretch, you’re going to move off the ball a lot to get to an open spot.
For the rest of the shooting badges, I upgraded them based on how I play the game. The upgrades will most likely vary between players. Some, however, are must-haves such as range extender. The badges that I upgraded are catch & shoot (HOF), corner specialist (bronze), deadeye (gold), deep fades (gold), pick & popper (silver), range extender (gold), tireless shooter (silver), and volume shooter (silver). I also made flexible release at gold because I don’t know every jumper’s timing inside and out, so I like having a reduced penalty for not greening a shot.
As for the playmaking badges, you’re going to upgrade quick first-step to gold. As a player with no handles, having a quick first-step is tremendously helpful in creating a shot. Unpluckable is another great badge to have on gold. Coming from a guy who’s been playing 2K for close to a decade, your opponents love to spam the steal button – especially those cheesy lockdown defenders. So, having unpluckable on gold provides added security to your weak dribble moves.
Break starter (gold), needle threader (sliver), post-spin technician (silver), and downhill (bronze) are the only other badges you’re really going to use in a game. The rest of the options don’t apply to a post-scoring stretch.
For the two defense/rebounding badge upgrades you have, divide them between brick wall and clamps. Without brick wall, your screens are useless, and that’s a problem because you’ll be most likely setting a lot of screens. Intimidator is a nice one because it boosts your ability to stay in front of the ball handler on the perimeter.
Final Thoughts
After finishing the test game in the demo, I’m fully convinced that this build is the best. It took a minute to figure out the weird shot meter and the annoying demo defense, but when I got it down, I was wet like water with this player. I was in my bag shooting over Draymond Green.
If you tried out the build and still weren’t good with it, maybe the build isn’t for you. In my opinion, this 6’10” PF is the best stretch in the game and one of the best out of all the positions.
Disagree with my take? Feel free to hit me up on Twitter or Instagram.